Weighted Blended Order-Independent Transparency
http://mynameismjp.files.wordpress.com/2014/02/blendedoit.zip
Back in December, Morgan McGuire and Louis Bavoil published a paper called Weighted Blended Order-Independent Transparency. In case you haven’t read it yet (you really should!), it proposes an OIT scheme that uses a weighted blend of all surfaces that overlap a given pixel. In other words finalColor = w0 * c0 + w1 * c1 + w2 * c2…etc. With a weighted blend the order of rendering no longer matters, which frees you from the never-ending nightmare of sorting. You can actually achieve results that are very close to a traditional sorted alpha blend, as long as your per-surface weights a carefully chosen. Obviously it’s that last part that makes it tricky, consequently McGuire and Bavoil’s primary contribution is proposing a weighting function that’s based on the view-space depth of a given surface. The reasoning behind using a depth-based weighting function is intuitive: closer surfaces obscure the surfaces behind them, so the closer surfaces should be weighted higher when blending. In practice the implementation is really simple: in the pixel shader you compute color, opacity, and a weight value based on both depth and opacity. You then output float4(color* opacity, opacity) * weight to 1 render target,while also outputting weight alone to a second render target (the first RT needs to be fp16 RGBA for HDR, but the second can just be R8_UNORM or R16_UNORM). For both render targets special blending modes are required, however they both can be represented by standard fixed-function blending available in GL/DX. After rendering all of your transparents, you then perform a full-screen “resolve” pass where you normalize the weights and then blend with the opaque surfaces underneath the transparents. Obviously this is really appealing since you completely remove any dependency on the ordering of draw calls, and you don’t need to build per-pixel lists or anything like that (which is nice for us mortals who don’t have pixel sync). The downside is that you’re at the mercy of your weighting function, and you potentially open yourself up to new kinds of artifacts issues depending on what sort of weighting function is used.
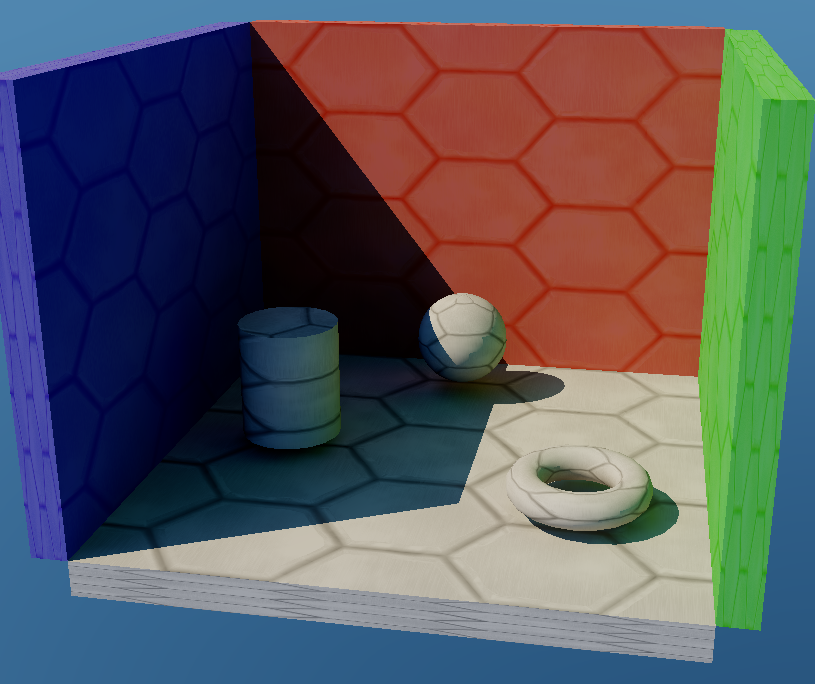
When the paper came out I read it and I was naturally interested, so I quickly hacked together a sample project using another project as a base. Unfortunately over the past 2 months there’s been holidays, the flu, and several weeks of long hours at work so that we could could finish up a major milestone. So while I’ve had time to visit my family and optimize our engine for PS4, I haven’t really had any time to come up with a proper sample app that really lets you explore the BOIT technique in a variety of scenarios. However I really hate not having source code and a working sample app to go with papers, so I’m going to release it so that others at least have something they can use for evaluating their proposed algorithm. Hopefully it’s useful, despite how bad the test scene is. Basically it’s just a simple cornell-box like scene made up of a few walls, a sphere, a cylinder, a torus, and a sky (I normally use it for GI testing), but I added the abililty to toggle through 2 alternative albedo maps: a smoke texture, and a tree texture. It doesn’t look great, but it’s enough to get a few layers of transparency with varying lighting conditions:
 The sample is based on another project I’ve been working on for quite some time with my fellow graphics programmer David Neubelt, where we’ve been exploring new techniques for baking GI into lightmaps. For that project I had written a simple multithreaded ray-tracer using Embree 2.0 (which is an awesome library, and I highly recommend it), so I re-purposed it into a ground-truth renderer for this sample. You can toggle it on and off to see what the scene would look like with perfect sorting, which is useful for evaluating the “correctness” of the BOIT algorithm. It’s very fast on my mighty 3.6GHz Core i7, but it might chug a bit for those of you running on mobile CPU’s. If that’s true I apologize, however I made sure that all of the UI and controls are decoupled from the ray-tracing framerate so that the app remains responsive.
I’d love to do a more thorough write-up that really goes into depth on the advantages and disadvantages in multiple scenarios, but I’m afraid I just don’t have the time for it at the moment. So instead I’ll just share some quick thoughts and screenshots:
**It’s pretty good for surfaces with low to medium opacity ** - with the smoke texture applied, it actually achieves decent results. The biggest issues are where there’s a large difference in the lighting intensity between two overlapping surfaces, which makes sense since this also applies to improperly sorted surfaces rendered with traditional alpha blending. Top image is with Blended OIT, bottom image is ground truth:
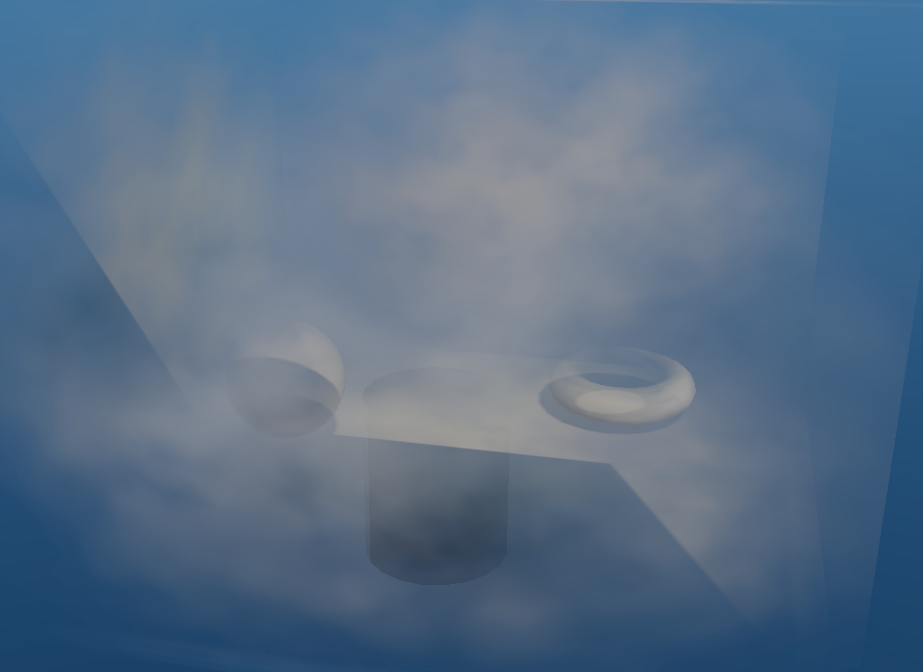
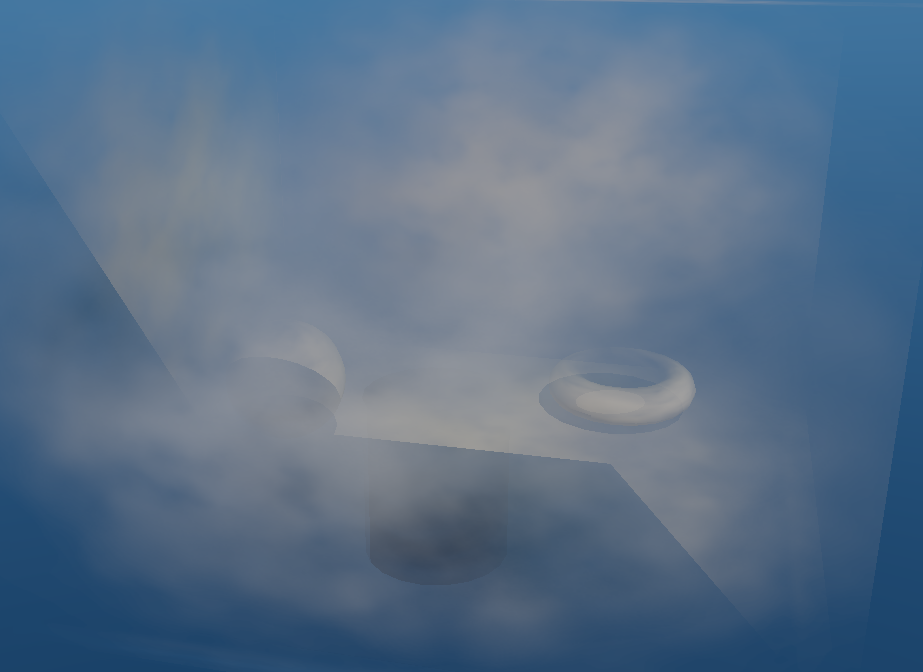
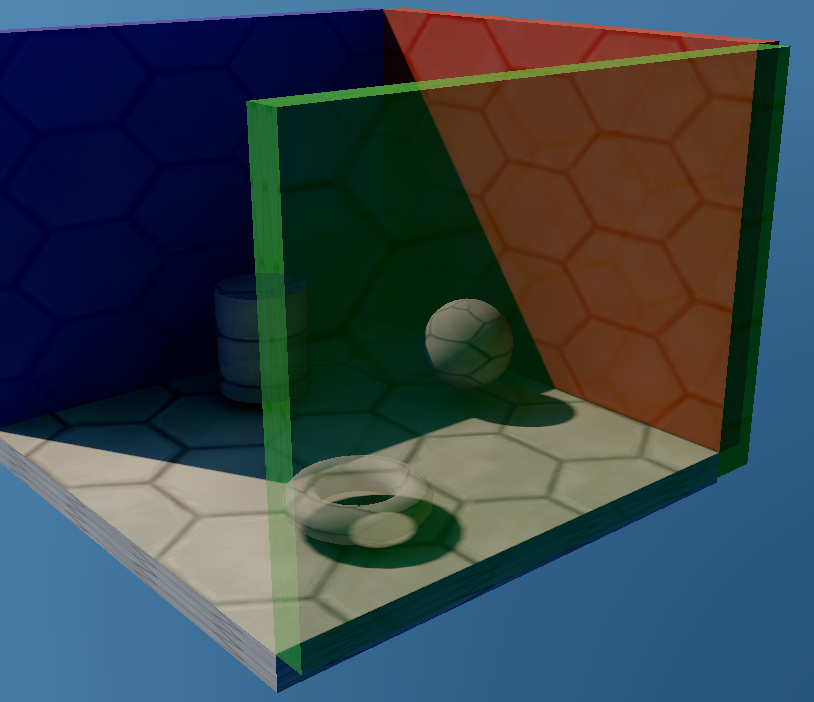
If you look at the area where the closer, brighter surface overlaps the darker surface on the cylinder you can see an example of where the results differ from the ground-truth render. Fortunately the depth weighting produces results that don’t look immediately “wrong”, which is certainly a big step up from unsorted alpha blending. Here’s another image of the test scene with default albedo maps, with an overall opacity of 0.25:
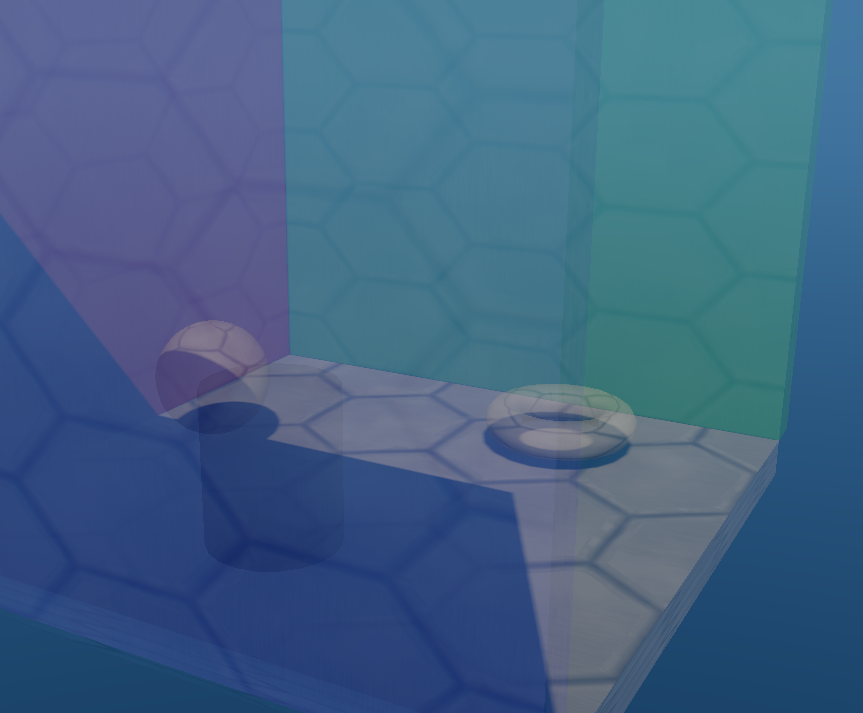
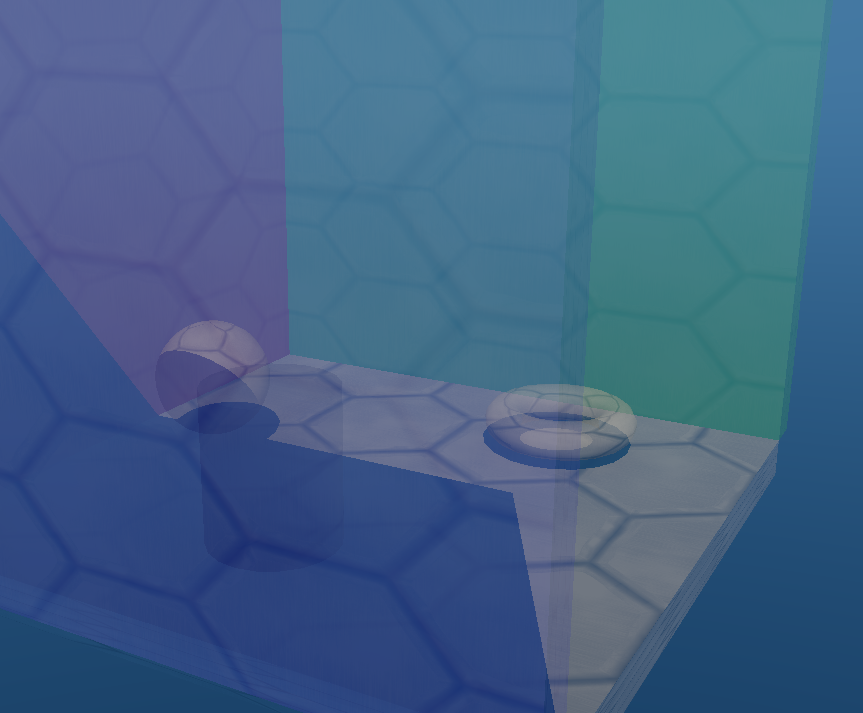
The technique fails for surfaces with high opacity - one case that the algorithm has trouble with is surfaces with opacity = 1.0. Since it uses a weighted blend, the weight of the closest surface has to be incredibly high relative to any other surfaces in order for it to appear opaque. Here’s the test scene with all surfaces using an opacity of 1.0:

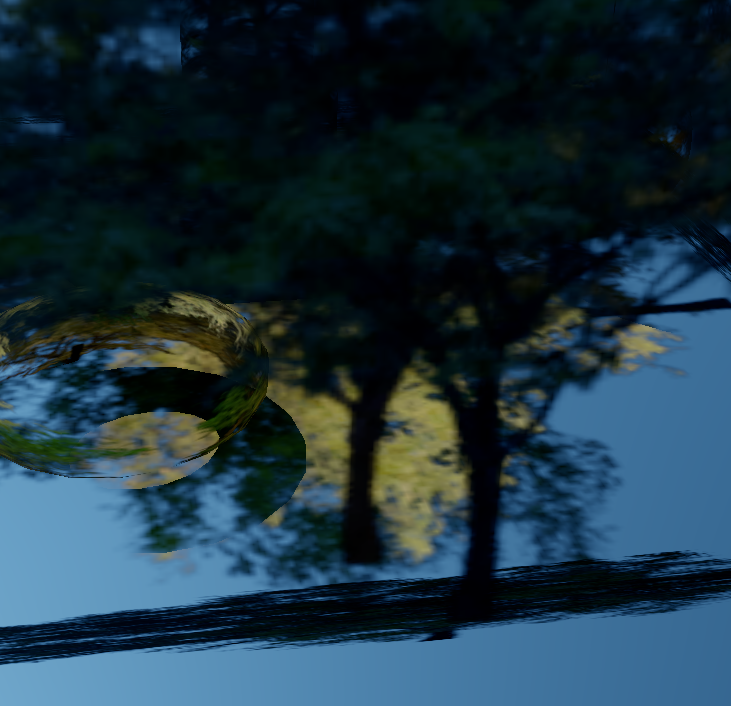
You’ll notice in the image that the algorithm does actually work correctly with opacity = 1 if there’s no overlap of transparent surfaces, so it does hold up in that particular case. However in general this problem makes it unsuitable for materials like foliage, where large portions of of surface need to be fully opaque. Here’s the test scene using a tree texture, which illustrates the same problem:
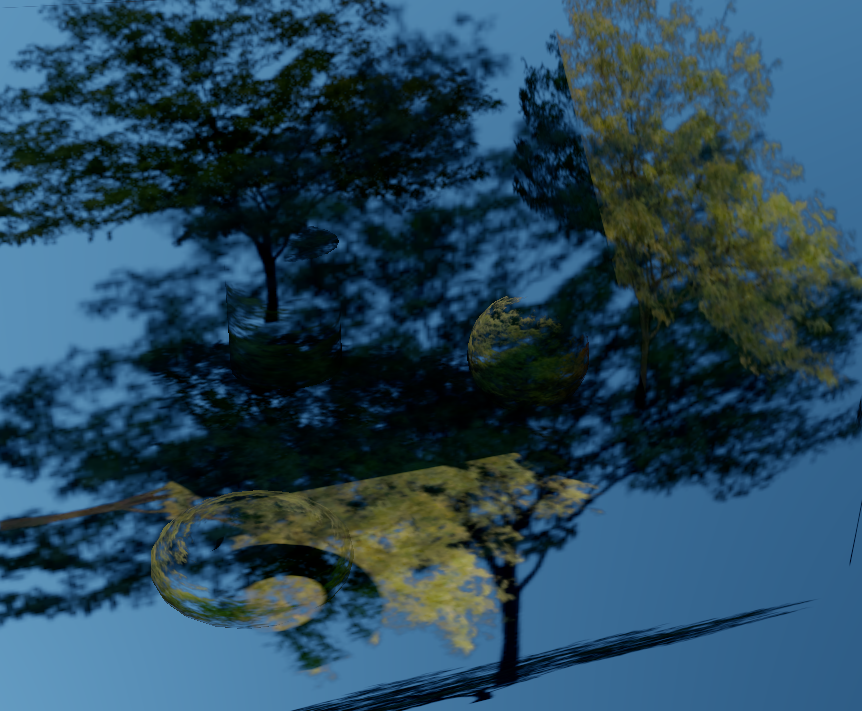
Like I said earlier, you really need to make the closest surface have a an extremely high weight relative to the surfaces behind it if you want it to appear opaque. One simple thing you could do is to keep track of the depth of the closest surface (say in a depth buffer), and then artificially boost the weight of surfaces if their depth matches the depth buffer weight. If you do this (and also scale your “boost” factor by opacity) you get something like this:

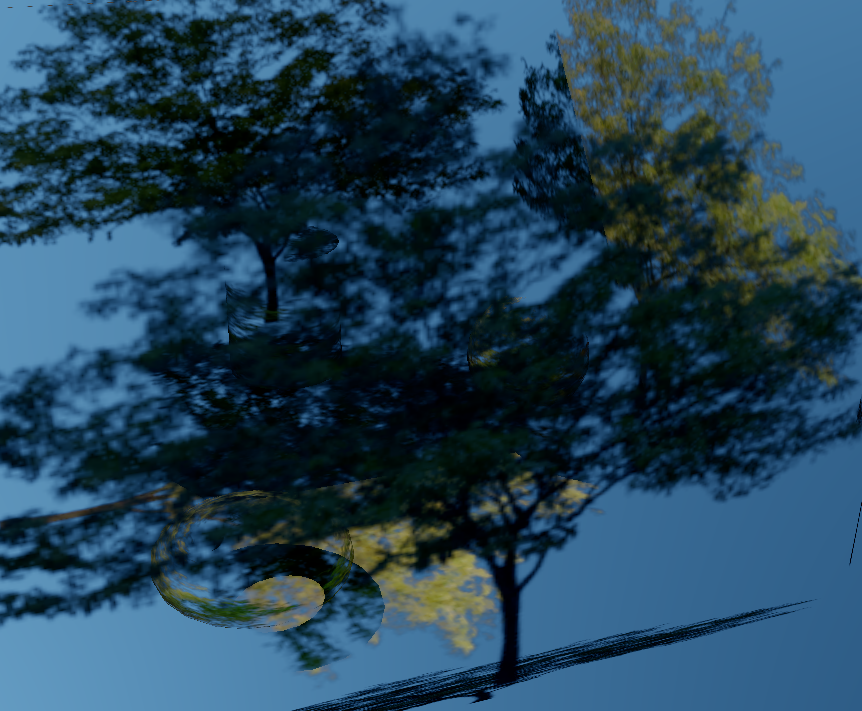
This result looks quite a bit better, although messing with the weights changes the alpha gradients which gives it a different look. This approach obviously has a lot of failure cases. Since you’re relying on depth, you could easily create discontinuities at geometry edges. You can also get situations like this, where a surface visible through a transparent portion of the closest surface doesn’t get the weight boost and remains translucent in appearance:

 Notice how the second tree true trunk appears to have a low opacity since it’s behind the closest surface. The other major downside is that you need to render your transparents in a depth prepass, which requires performance as well as the memory for an extra depth buffer. However you may already be doing that in order to optimize tiled forward rendering of transparents. Regardless I doubt it would be useful except in certain special-case scenarios, and it’s probably easier (and cheaper) to just stick to alpha-test or A2C for those cases.
**Is it usable? **- I’m not sure yet. I feel like it would take a lot of testing the wide range of transparents in our game before knowing if it’s going to work out. It’s too bad that it has failure cases, but if we’re going to be honest the bar is pretty damn low when it comes to transparents in games. In our engine we make an attempt to sort by depth, but our artists frequently have to resort to manually setting “sort priorities” in order to prevent temporal issues from meshes constantly switching their draw order. The Blended OIT algorithm on the other hand may produce incorrect results, but those results are stable over time. However I feel the much bigger issue with traditional transparent rendering is that ordering constraints are fundamentally at odds with rendering performance. Good performance requires using instancing, reducing state changes and rendering to low-resolution render targets. All 3 of those these are incompatible with rendering based on Z order, which means living with lots of sorting issues if you want optimal performance. With that in mind it really feels like it’s hard to do worse than the current status-quo. That’s about all I have for now. Feel free to download the demo and play around with it. If you missed it, the download link is at the top of the page. Also, please let me know if you have any thoughts or ideas regarding the practicality of the technique, since I would definitely be interested in discussing it further.
Comments:
MJP -
Hi Morgan, Thank you for letting me know about the typo, and offering some guidance! After GDC I will have to revisit this, and see if I can get better results.
#### [Richard Fine](http://crunchbites.wordpress.com "rfine@tbrf.net") -
Interesting technique. One extension I’m wondering about: what if you wrote weighted normals, as well as weight, to that second RT? Could you then include a dynamic directional light in your resolve pass?
#### [Victor]( "") -
Also it seems like the sevind buffer’s output is the pixel’s alpha value, not the weight.
#### [dishwasher](http://none "dishwasherblood@gmail.com") -
Hi MjP, this demo includes lightmap - LightmapSH.texdata. I can see how it is used, but how do you generate it? In Maya and then somehow convert it to custom format? Would appreciate help. :)
#### [MJP](http://mynameismjp.wordpress.com/ "mpettineo@gmail.com") -
I actually have a custom GI baking framework that myself and my coworker use for experimenting with GI techniques. That particular lightmap contains radiance stored as 2nd-order spherical harmonics, and was generated using monte carlo integration to project the radiance at each texel onto the spherical harmonics basis. I use embree to perform the ray intersections on the CPU, which is a pretty awesome library. I was planning on releasing the code at some point once we had something cool to show off, but I could release it earlier if there’s interest.
#### [dishwasher](http://none "dishwasherblood@gmail.com") -
I would be actually very interested in seeing the code, this GI baking framework seems really neat. :)
#### [Morgan McGuire](https://plus.google.com/102642479743803485873 "morgan3d@gmail.com") -
There was a typo in the original paper that may be the reason that your results don’t look as good as ours. I just fixed this in the PDF online and wrote a blog post showing good results for some difficult scenes and giving some advice for implementation: http://casual-effects.blogspot.com/2014/03/weighted-blended-order-independent.html The primary limitation of the technique is that the depth weight has to be tuned for the content. I use the same curve for all scenes (equation 9 in the paper), scaled to the actual near and far plane of the scene. It looks like you aren’t using a steep enough curve to support high alpha values. Try using equation 9 for your depth range, and raise the exponents if it still isn’t enough.
#### [Rosario](http://www.carmageddon.com "rosario@stainlessgames.com") -
I tried to implement this technique in our game engine and I was able to resolve all the artefact to a playable state… for a static scene. But when particles (very low alpha, very near to the camera) go on top of a very distant but almost solid translucent object (the sea at the horizon or ice blocks) we had random annoying flashes. And this is almost unavoidable without tweaking continuously the weight function, probably a “per object” weight multiplier can solve these problems but I think is too much works for the artist. I’m pretty sure somebody will come with a smart compute shader solution at some point, till then I think I’ll using this technique only for low-res particle.