How To Fake Bokeh (And Make It Look Pretty Good)
Before I bought a decent DSLR camera and started putting it in manual mode, I never really noticed bokeh that much. I always just equated out-of-focus with blur, and that was that. But now that I’ve started noticing, I can’t stop seeing it everywhere. And now every time I see depth of field effects in a game that doesn’t have bokeh, it just looks wrong. A disc blur or even Gaussian blur is fine for approximating the look of out-0f-focus areas that are mostly low-frequency, but the hot spots just don’t look right at all (especially if you don’t do it in HDR).
So what are our options for getting a decent bokeh look in real time? Here’s a short (and by no means complete) list:
1. Render the scene multiple times and accumulate samples using the aperture shape - this obviously a no-go for real-time rendering.
2. Stochastic rasterization, using scatter - this becoming more feasible now that we can implement scatter in pixel or compute shaders, but requires a lot of samples to not look like crap (or maybe something like this) and would likely have performance problems due to the non-coherent memory writes
3. Do scatter-as-gather as a post process - this is doable and could be implemented in a compute shader or even a pixel shader, but it’s expensive since you need a huge number of samples for large CoC sizes. Plus it can be tricky to implement, since you really need to be careful about energy conservation. Gamedev user FBMachine actually implemented this approach and documented some of the issues here…as you can see the results can be nice but the performance isn’t so great.
4. Render each pixel as point sprite, using the CoC-size + aperture shape - this approach initially sounds completely unrealistic, since you’re talking about huge bandwidth usage from the blending and massive overdraw. However the guys who make 3DMark actually implemented some optimizations to make it usable for their “Deep Sea” demo in 3DMark11. They go into a little bit of detail in their white paper, but the basic gist of it is that they extract pixels with a CoC above a given threshold and append the point into an append/consume buffer (basically a stack that your shaders can push onto or pull from), then render the points at point sprites to one of several render targets. The render targets are successively smaller like mip levels, and they render the larger points to smaller render targets. By doing this they help curb the massive overdraw/blending cost of large points. They also do the point extraction several times, each time from a progressively downsampled version of the input image and with a different CoC threshold. I presume they do this to avoid extracting huge amounts of points.
The guys at Capcom also did something similar to this for the DX10 version of Lost Planet, although I’m not too familiar with the details. There’s some pictures + descriptions here and here.
5. Pick out the bright spots, render those as point sprites using the aperture shape, and do everything else with a “traditional” blur-based DOF technique - ideally with this approach we get the nice bokeh effects for that parts where it’s really noticeable (the highlights), and use something cheap for everything else. Gamedev.net poster Hodgman took a crack at implementing this approach using point sprites and vertex textures, and documented his results in this thread. His main problems were due to flickering + instability, since he had to downscale many times in order to render the grid of point sprites.
For my own implementation, I decided to go for #5. I spent a lot of time staring at out-of-focus images, and decided that it really wasn’t necessary to do a more accurate bokeh simulation for most of the image. For instance, take a look at this picture:
 At least 90% of that image doesn’t have a distinctive bokeh pattern, and looks very similar to either a box blur or disc blur with a wide radius. It’s only those bright spots that really need the full bokeh treatment for it to look convincing.
With that in mind, I came up with the following approach:
- Render the scene in HDR
- Do a full-res depth + blur generation pass where we sample the depth buffer, and write out linear depth + circle of confusion size to an R16G16_FLOAT buffer
- Do a full-res bokeh point extraction pass. For each pixel, compute the average brightness of the 5x5 block surrounding the pixel and compare it with the brightness of the current pixel. If the pixel brightness minus the average brightness is above a certain threshold and the CoC size is above a certain threshold, push the pixel position + color + CoC size onto an append buffer and output a value of 0.0 as the pixel color. If it doesn’t pass the threshold, output the input color.
- Do a regular DOF pass. I implemented two versions: one that does a full-res disc-based blur in two passes using 16 samples on a Poisson disc with radius == CoC size, and one that does ye olde 1/4-res Gaussian blur (with edge bleeding reduction) and a full-screen lerp between the un-blurred and blurred version.
- Copy the embedded count from the append buffer to another buffer, and use the second buffer as an indirect arguments buffer for a DrawInstancedIndirect call. Basically this lets us draw however many points are in the buffer, without having to copy anything back to the CPU. The vertex shader for each point then samples the position/color/CoC size from the append buffer and passes it to the geometry shader, which expands the point into a quad with size equal to the CoC size. The pixel shader then samples from a texture containing the aperture shape, and additively blends the result into an empty render target. The render target can be either full res, or 1/4 res to save on bandwidth.
- Combine the results of the bokeh pass with the results of the DOF pass by summing them together in a pixel shader.
- Pass the result to bloom + tone mapping, and output the image.
I actually implemented everything with pixel shaders, since I find they’re still quicker for rapid prototyping compared to compute shaders. The bokeh generation step and Guassian blurs probably would have benefited from using shared memory to avoid redundant texture samples, but not so much that penalty is huge. The disc-based blur isn’t all that great of a fit either, since I used a very large sampling radius (usually at least 16 pixels). For the disc blur I also did it in two passes with 16 samples each, in order to avoid some of the nasty banding artifacts that come from using a large sampling radius. This leads to some artifacts around edges, but it’s too bad. Either way the DOF part isn’t really important, and you could swap it out with whatever cool new technique you want. I also didn’t end up using proper lens-based CoC-size calculations, since I found it was a pain in the ass to work with. So I reverted to a very simple linear interpolation between “out-of-focus” and “in-focus” distances, and then multiplied the value by a tweakable maximum CoC size.
As for the bokeh itself, it looks pretty good since it’s using a texture and can have whatever shape you want. It’s also pretty stable since the extraction is done at full resolution, and so you don’t get much flickering or jumping around. I didn’t use depth testing when rendering the bokeh sprites…I had intended on doing it, but then decided it wasn’t really necessary. However I’d imagine it would probably be desirable if you wanted to render really large bokeh spoints, in which case it would be trivial to implement.
Now for some results. This is with the foreground in focus, and the background out of focus:
The bokeh isn’t too distinctive here since most of the image is in focus, but you can definitely see the hexagon pattern on some of the background geometry.
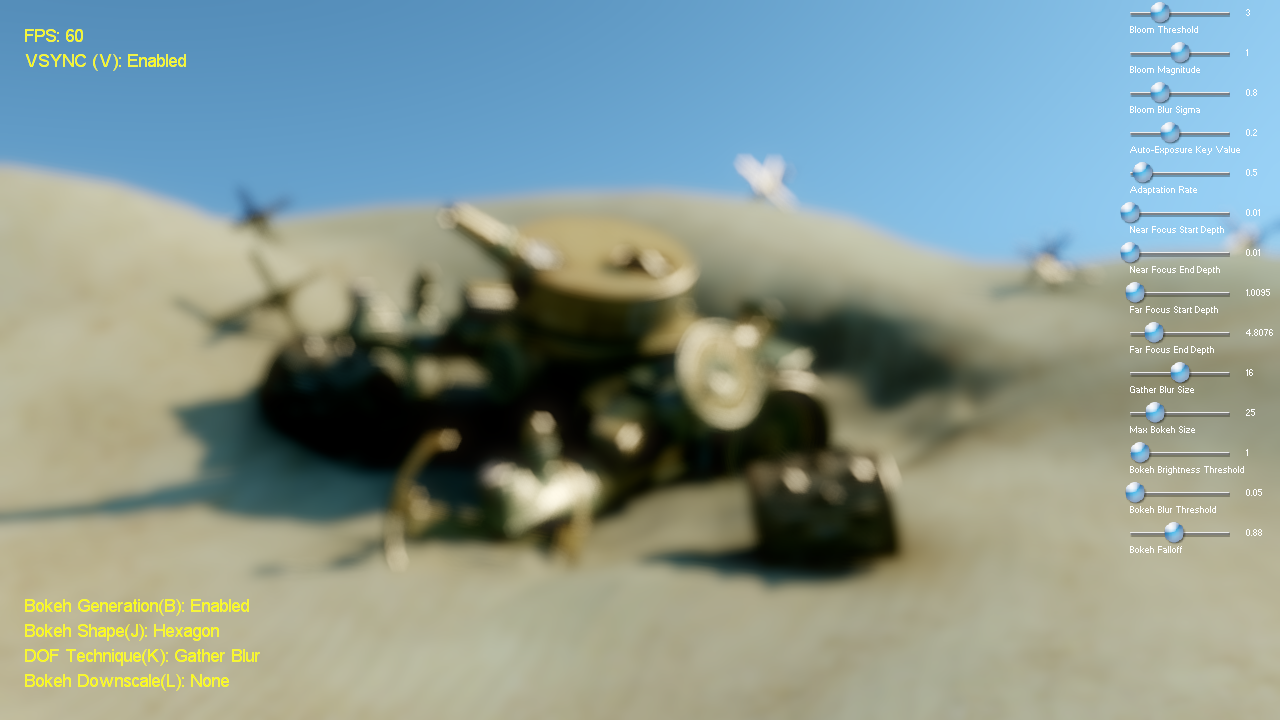
This one has the whole scene out of focus, and so you can see a lot more of the bokeh effect:
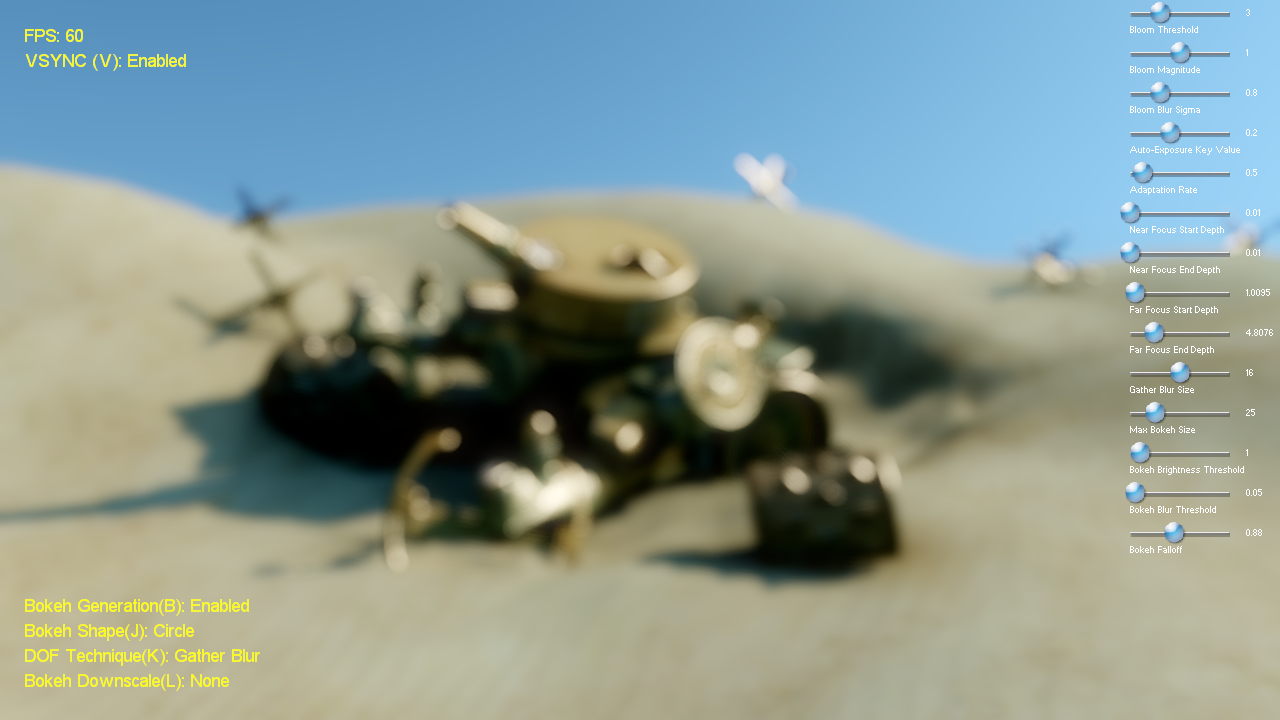
Now you can really see the bokeh! Here’s another with a circle-shaped bokeh:
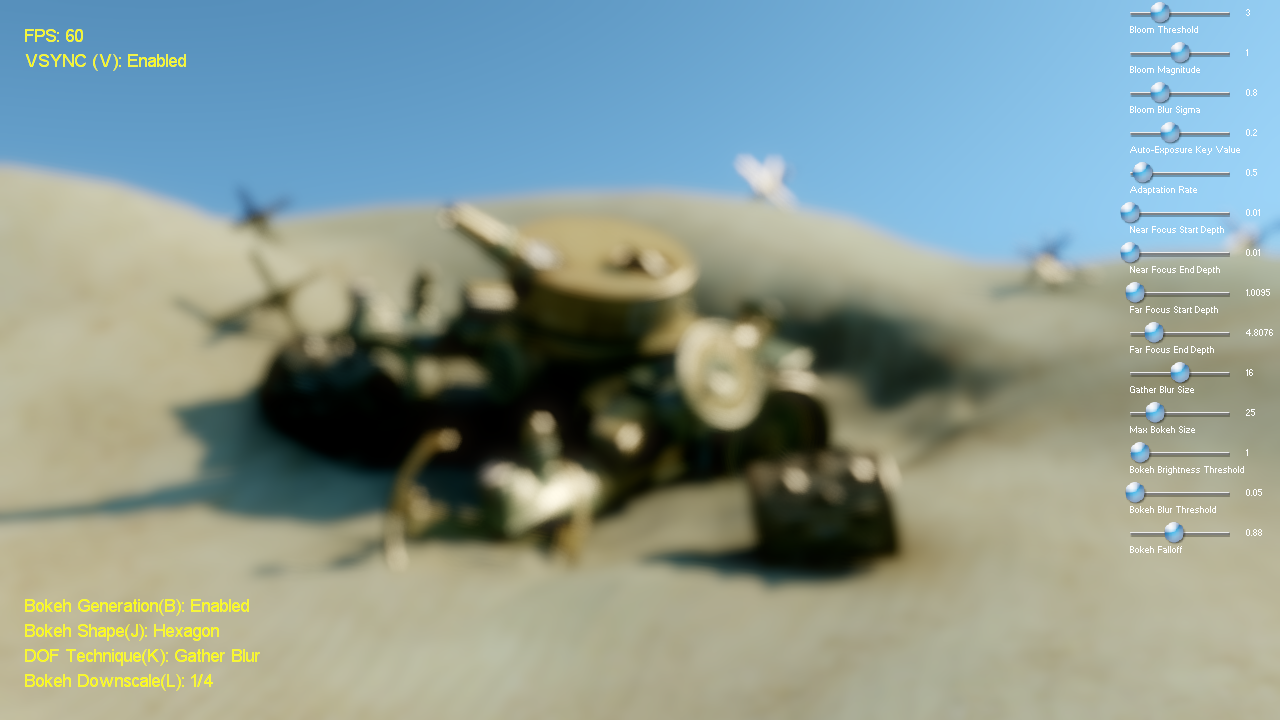
This one is with the bokeh sprites rendered to a 1/4-resolution texure:
 Finally, this one is with the brightness threshold set to 0. Basically this means they every out of focus pixel gets drawn as a point sprite, which I used as a sort of “reference” image.
I think the earlier shots hold up pretty well in comparison! The biggest issue that I notice is that it can look a bit weird if you DOF blur radius and your bokeh radius don’t match up. It starts to become pretty obvious if you crank up the maximum bokeh size, but still use a small radius for blurring everything else. This is because you don’t want to be able to clearly discern what’s “underneath” the bokeh sprites…you want it to pretty much look like a solid color. To help with this I added a parameter to tweak the falloff used for conserving energy as as the bokeh point sprites get larger. Basically it does a pow on the falloff, which is computed by calculating the ratio of area of a circle with radius == CoC and comparing it with the radius of a single pixel. So by setting the falloff tweak to a lower value, the points are artificially brightened and appear more opaque.
If you want to check it out yourself, you can download the source code + binaries here: https://mynameismjp.files.wordpress.com/2011/02/bokeh3.zip
Updated (3/27/2011): Changed the shadow filtering shader code so that it doesn’t cause crashes on Nvidia hardware
Comments:
ozlael -
Always thank you for useful article.
#### [Hodgman]( "bigmrpoo@yahoo.com") -
Glad to see my post has helped someone! Thanks for sharing your implementation of the effect too :D
#### [Louis Castricato]( "ljcrobotic@yahoo.com") -
SlimDX? :P
#### [Michael]( "jayben71@gmail.com") -
This is great and a very interesting technique, other methods do not have much over this visually (for games) . Also, the app is crashing in windows 7 32-bit 480GTS and works fine with ATI HD5830
#### [Bokeh II: The Sequel « The Danger Zone](http://mynameismjp.wordpress.com/2011/04/19/bokeh-ii-the-sequel/ "") -
[…] I finished the bokeh sample, there were a few remaining issues that I wanted to tackle before I was ready to call it […]
#### [Styves]( "luv-bunneh@hotmail.com") -
Glad to see a good explanation on it. Looks great. :) Any chance at getting info on how to go about implementing this in a DX10 environment? The StructuredBuffer stuff’s got me confused. It would be really useful. :D
#### [default_ex]( "default_ex@live.com") -
Should take a look at research.tri-ace.com, specifically the later half of the slides from their SO4 post processing slides. One of the things they go into is a Bokeh effect that comes pretty close to a cinematic camera. What I really liked about tri-ace approach is that it doesn’t require running a gaussian blur pass, just linear down scaling, which your likely already doing for HDR.
#### [Gregory]( "gpakosz@yahoo.fr") -
Alright, thank you for answering I have to confess I didn’t check the source code before asking as I sadly don’t own a DX11 GPU. Looks like it’s time to fix this. Thank you for your time and article.
#### [Gregory]( "gpakosz@yahoo.fr") -
is dx11 really a must for this sample? or is it just your sample framework that requires dx11 in any case?
#### [MJP](http://mynameismjp.wordpress.com/ "mpettineo@gmail.com") -
AppendStructuredBuffer’s (and pixel shader UAV’s in general) require a FEATURE_LEVEL_11 device, so yeah it’s actually required.
#### [MJP](http://mynameismjp.wordpress.com/ "mpettineo@gmail.com") -
The Tri-ace guys did plenty of blurring…they just did the blurring at multiple mip levels so that they could cheaply approximate wide blur kernels without a ton of texture samples.
#### [Corey Smith](http://www.facebook.com/profile.php?id=625125791 "jenius00@yahoo.com") -
Thank you for putting this together! Good looking real time bokeh is something I have been curious about but I had no place to start and I’m not working with a strong background. It’s nice to have jumping off point without trying to discern where the important details lie wading through very involved rendering techniques that reach far beyond my knowledge. Will I ever touch this information again? Who knows if I’ll find time to actually investigate it, let alone try and apply it. But I appreciate you putting it together! Very interesting.
#### [Bokeh depth of field – going insane! part 1 | Bart Wronski](http://bartwronski.com/2014/04/07/bokeh-depth-of-field-going-insane-part-1/ "") -
[…] 2. Probably best for “any” shape of bokeh – smart modern DirectX 11 / OpenGL idea of extracting “significant” bokeh sprites by Matt Pettineo. [2] […]
#### [seo](http://seo "2578Bosack@gmail.com") -
Hi there would you mind stating which blog platform you’re working with? I’m looking to start my own blog soon but I’m having a tough time deciding between BlogEngine/Wordpress/B2evolution and Drupal. The reason I ask is because your design seems different then most blogs and I’m looking for something unique. P.S Apologies for being off-topic but I had to ask!
#### [Andrew Butts]( "andrewbutts@andru.net") -
Superduper article… add vignetting :-)
#### []( "") -
YOU DONT KNOW WTF BOKEH IS
#### [Draft on depth of field resources | Light is beautiful](http://lousodrome.net/blog/light/2012/01/17/draft-on-depth-of-field-resources/ "") -
[…] Matt Pettineo also discussed a few approaches to fake bokeh […]
#### [Jason Yu]( "chunwahyu@hotmail.com") -
Is the source code still available, I would like to have a look
#### [Shaders PT2 | kosmonaut games](https://kosmonautblog.wordpress.com/2017/03/17/shaders-pt2/ "") -
[…] didn’t use any templates for this, but I have stumbled upon this implementation by MJPhttps://mynameismjp.wordpress.com/2011/02/28/bokeh/It uses a stock blur for most parts of the image and only applies the bokeh effect on extracted […]
#### [各种Depth of Field « Babylon Garden](http://luluathena.com/?p=2279 "") -
[…] sprite,其他部分就是普通的模糊处理[14]。这篇博客里有详细的介绍和代码提供,效果也是不错的,GPU […]


